Chatbot Interface
The Chatbot Interface in Flowbee.io is where you create, manage, and design your chatbot flows. It provides a visual workspace to build automation using nodes, configure settings, and control how your chatbot interacts with customers.
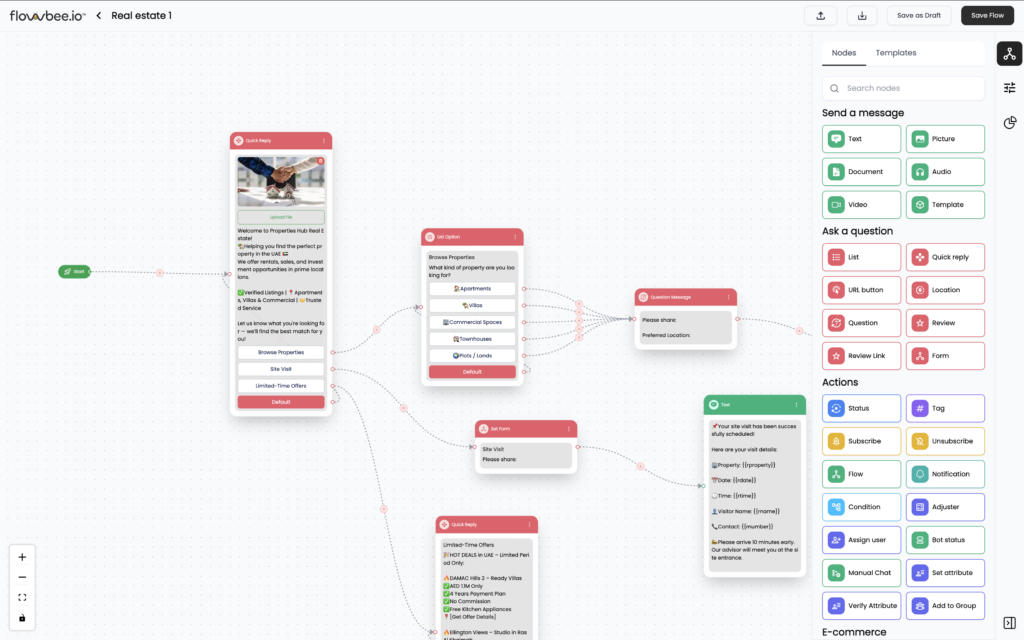
🧭 Canvas Controls & Navigation
Flowbee Chatbot Builder provides tools to help you navigate, organize, and manage your flow workspace efficiently. These controls allow you to zoom, align, and lock your flow while designing or reviewing it.
- ‘+’ (Zoom In): This feature allows you to zoom in on the content displayed on the screen. Useful for focusing on specific details or elements within the content, especially in situations where there’s a need for a closer view.
- ‘-‘ (Zoom Out): This feature allows you to zoom out, providing a broader view of the content on the screen. Helpful for getting an overview of the entire canvas or content, especially when you want to see a larger portion of the information.
- ‘[ ]’ (Fit to Screen View): This feature adjusts the view to fit the entire content within the screen. Useful when you want to quickly see the entirety of the canvas or content without manually adjusting the zoom level.
- Lock (Enable View-Only Mode): This feature locks the interactive elements on the canvas, preventing the movement of cards or objects. It is particularly helpful when you want to present information without the risk of accidentally moving or modifying the content. This feature is ideal for a view-only or presentation mode.
🟢 Start Node
The Start Node is the entry point of every chatbot flow. It is where the conversation begins and acts as the starting trigger for all actions within the flow.
Whenever a chatbot flow is activated (through keywords or default trigger), the Start Node is the first step that gets executed.
1. Direct Connection
Connect the Start Node directly to the next node to begin the flow immediately.
🧩 Chatbot Node Drawer
The Node Drawer is where you will find all the available nodes required to build your chatbot flow. It acts as a toolbox that allows you to create messages, ask questions, perform actions, and integrate with external systems.
You can simply drag and drop nodes from this panel into the flow builder to create your conversation.
⚙️ Configure Nodes
You can easily configure and update node values directly from the flow builder.
How It Works
- Double-click on any node in the flow
- A configuration popup screen will open
- Update the required fields (message, options, settings, etc.)
- Save the changes

⚙️ Flow Settings Panel
The Flow Settings Panel allows you to configure important settings for your chatbot flow. It is available on the right side of the builder and helps you manage flow details, testing options, and session behavior.
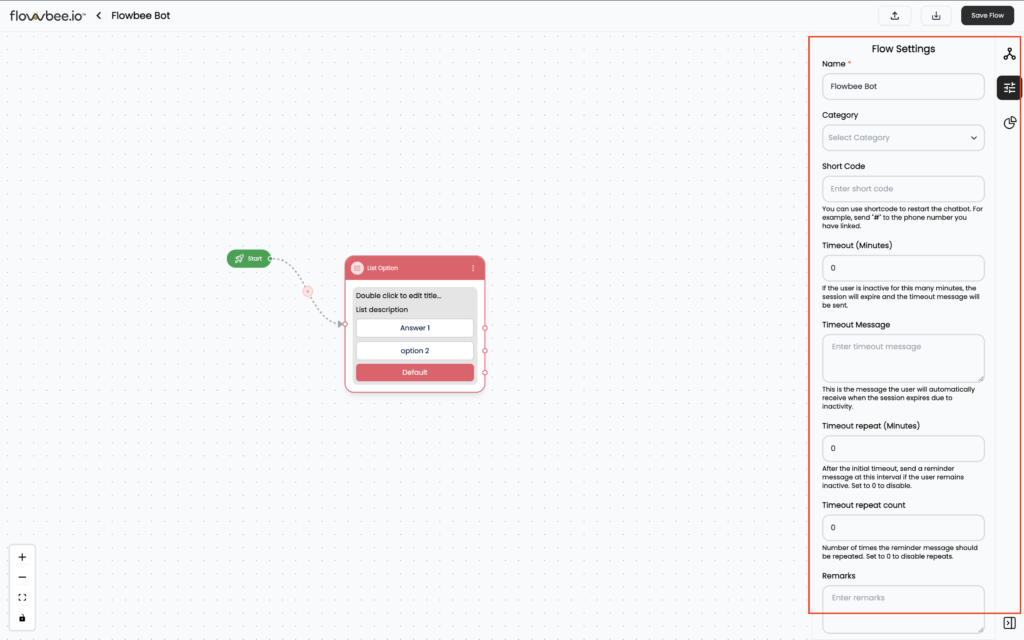
🏷️ Flow Name
You can update the name of your chatbot flow from this section.
🔑 Short Code (Testing)
This feature will let you test the bot on WhatsApp before publishing it.
How it works:
- Enter a short code (e.g.,
test) - Send
#testto your WhatsApp number - The chatbot flow will start instantly
👉 This allows you to test flows without publishing.
📂 Import & Export Flow
Flowbee allows you to manage chatbot flows using JSON files.
- Export Flow → Download flow as JSON
- Import Flow → Upload and reuse existing flow
👉 Useful for backup, sharing, or duplicating flows
💾 Save Options
You have multiple save options available:
- Save as Draft → Save without activating
- Save Flow → Save current changes
👉 Always save your work before exiting
⏱️ Timeout Settings
Control session timing and user inactivity behavior.
- Timeout (Minutes)
→ Ends session after inactivity - Timeout Message
→ Message sent when session expires - Timeout Repeat
→ Send reminder message at intervals - Repeat Count
→ Number of times reminder is sent
👉 Helps manage inactive users automatically
What is a Variable?
A Variable is used to store and reuse data inside your chatbot flow. It helps you personalize conversations, collect user information, and control chatbot logic based on user inputs.
Flowbee supports two types of variables:
1.Default Variables
Default variables are pre-defined by the system and automatically capture customer details.
Examples:
- Customer Name →
{{customer_name}} - Mobile Number →
{{customer_mobile}} - Email →
{{customer_email}} - Other saved contact fields
👉 These variables are useful for personalizing messages.
2.Custom Variables
Custom variables are created by you to store specific data collected during the chatbot flow.
You can use them to:
- Store user responses
- Save form inputs
- Use in conditions and logic
Example:
{{service_type}}{{preferred_date}}{{location}}
👉 These variables help in building dynamic and personalized chatbot flows.